“I want to start drawing but I don’t know how”
This is a message that I find myself getting a lot from people. Often they will ask me how to draw with perfect detail, but I feel this is not the way to start. So I’ve tried my best to capture the methods that I use when drawing and how you can hopefully improve your drawing skills.
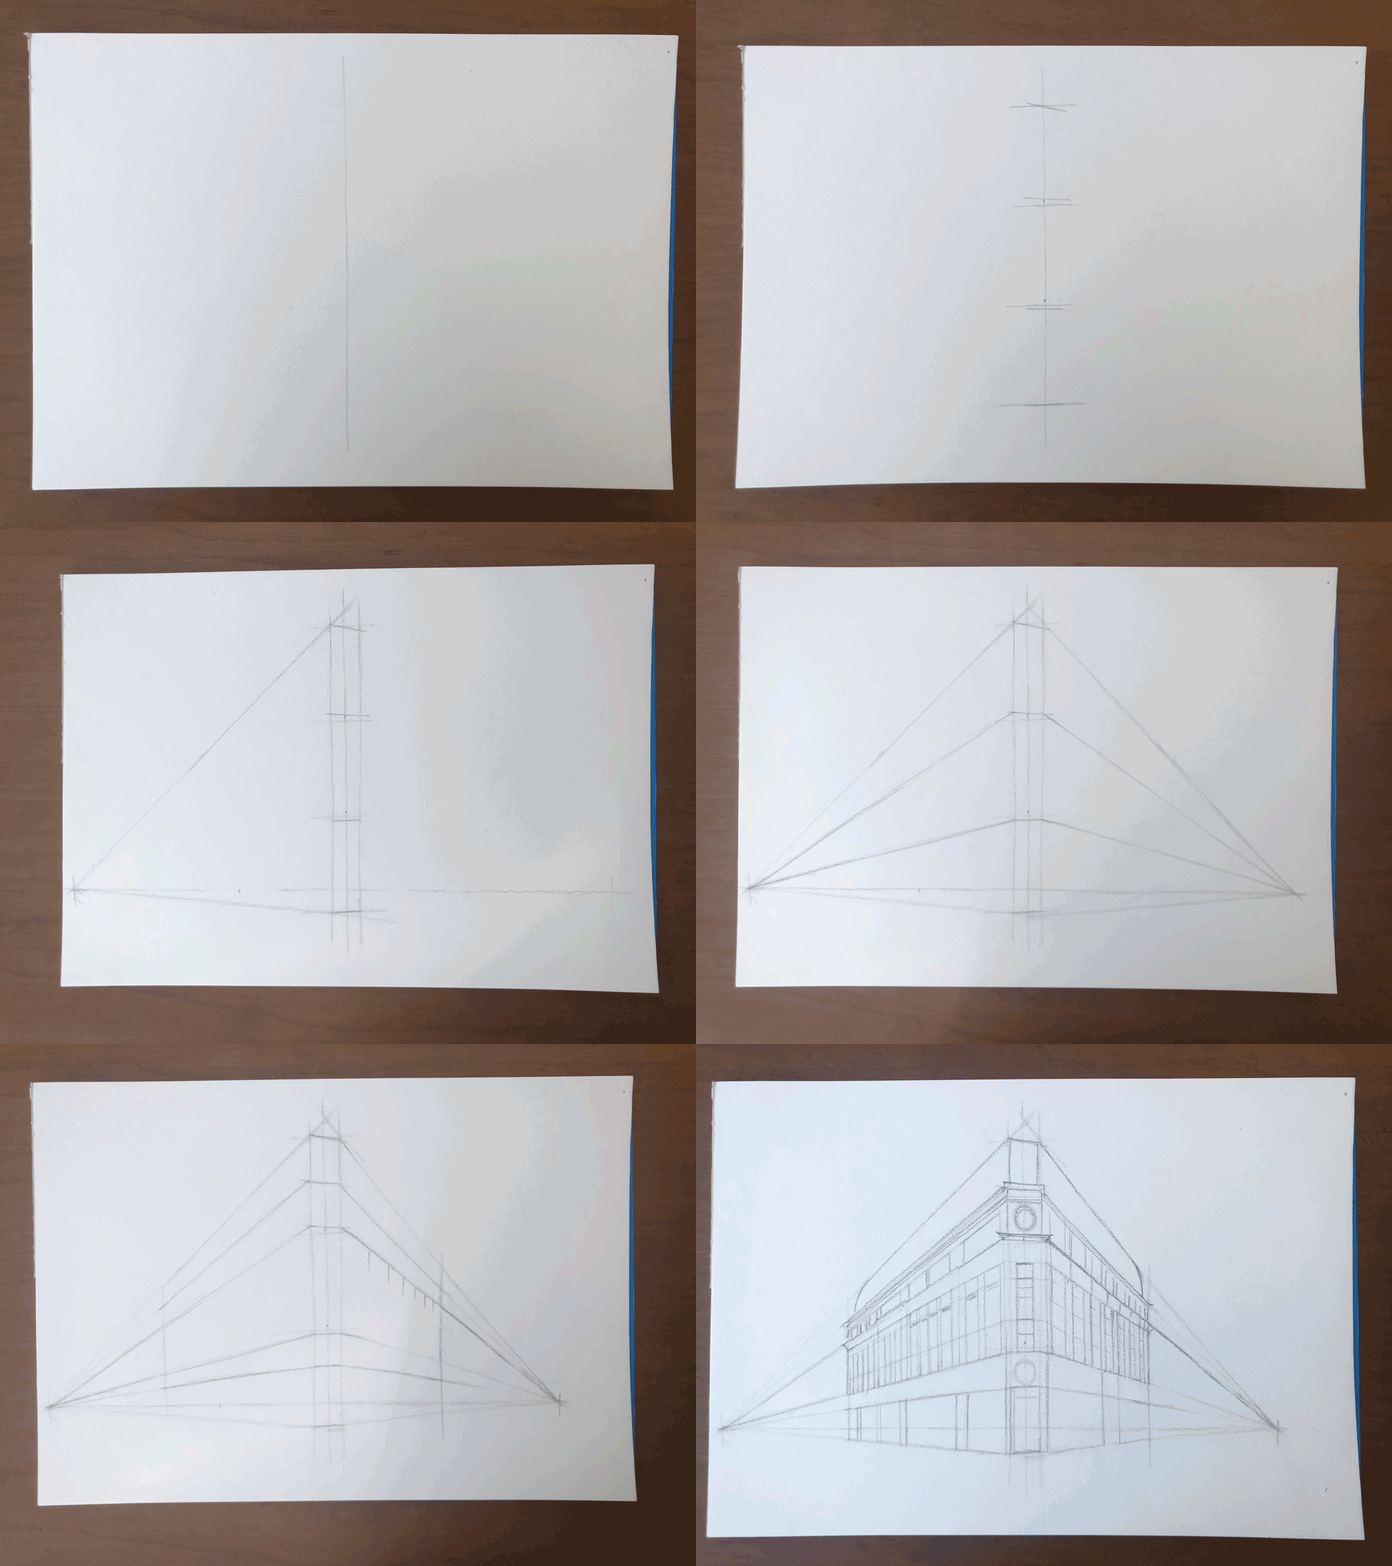
Below is a brief tutorial on how to draw the LSQ in Leicester Square,
but this technique can be applied to any architectural subject.
There is a more detailed step by step breakdown in the links that follow.
If you like, grab a pen and paper and follow along, share your results with me on instagram @Henboydesigns
Perspective
One of the most important aspects of drawing architecture is the perspective. How big do you want your subject to look? How close is the subject?
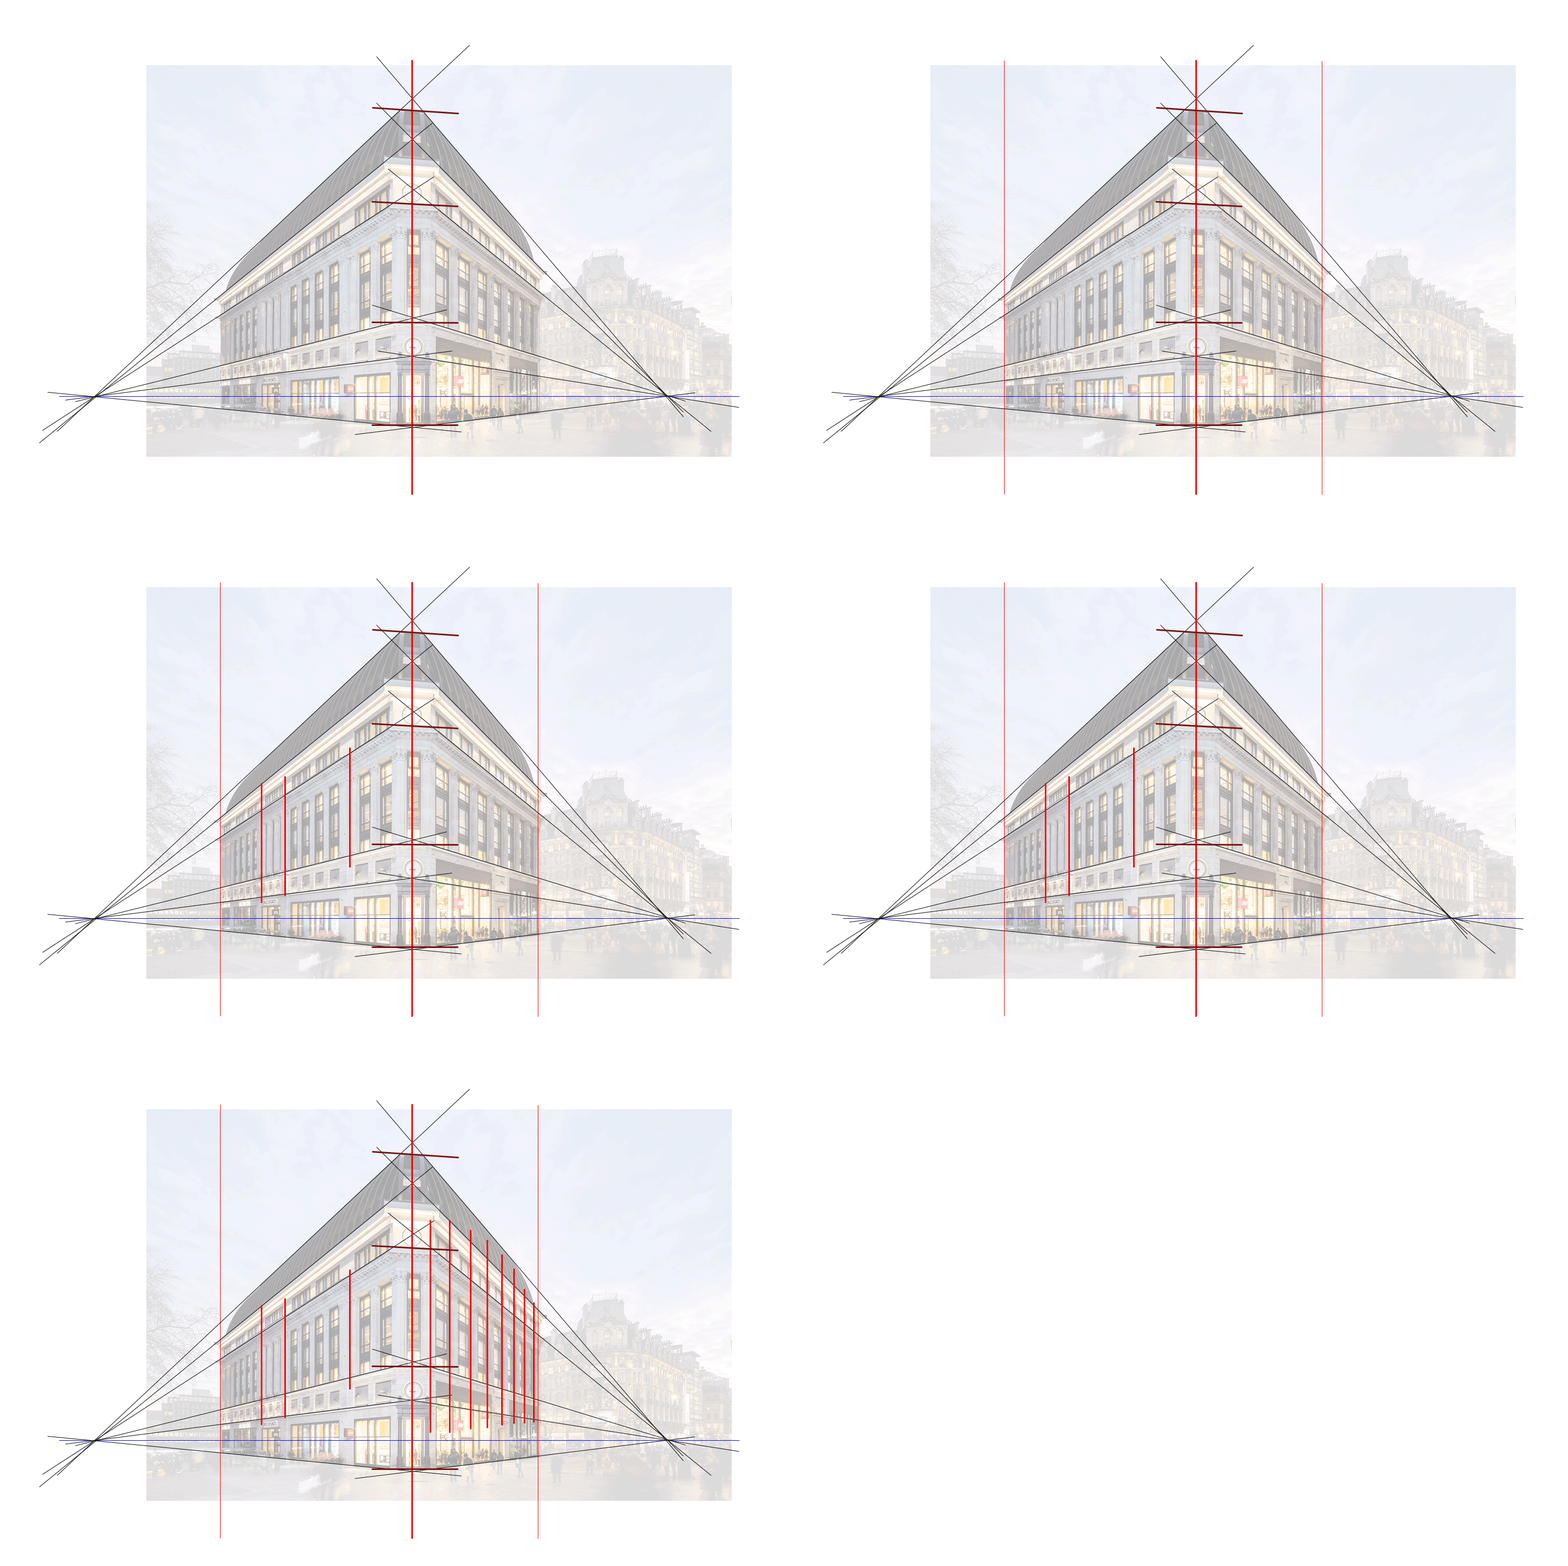
Use vanishing points to dictate the perspective, you can then use these points to extract rules showing where the horizontal and vertical lines should go. Start by drawing the horizon and go from there.
This should all be done in light pencil marks, as it may take a few tries to get it right. If you struggle with straight lines feel free to use a ruler but I recommend practicing free hand as it’s just good technique and much quicker.
Guidelines
Once you have your vanishing points in place and have created some lines to help the perspective, you can then input some more guide lines which will determine the proportions. Try to use every aspect of the subject to determine sizing and positioning. If a wall has four windows, divide the wall into four segments first, then input the windows.
These lines should be important features in the subject you are drawing; outlines, corners and places where you can separate the subject into smaller segments. This should also be done in light pencil marks.
The steps so far
Hopefully you should have something similar to the images on the left. You have your perspectives in place and a general outline of all the major segments. I added lines either side of the centre because there is a chamfer on the front corner, this helped guide the rest of the segments into place. You can add as much or as little details as you want for now, it’s all guidance for the next step.
Outlining
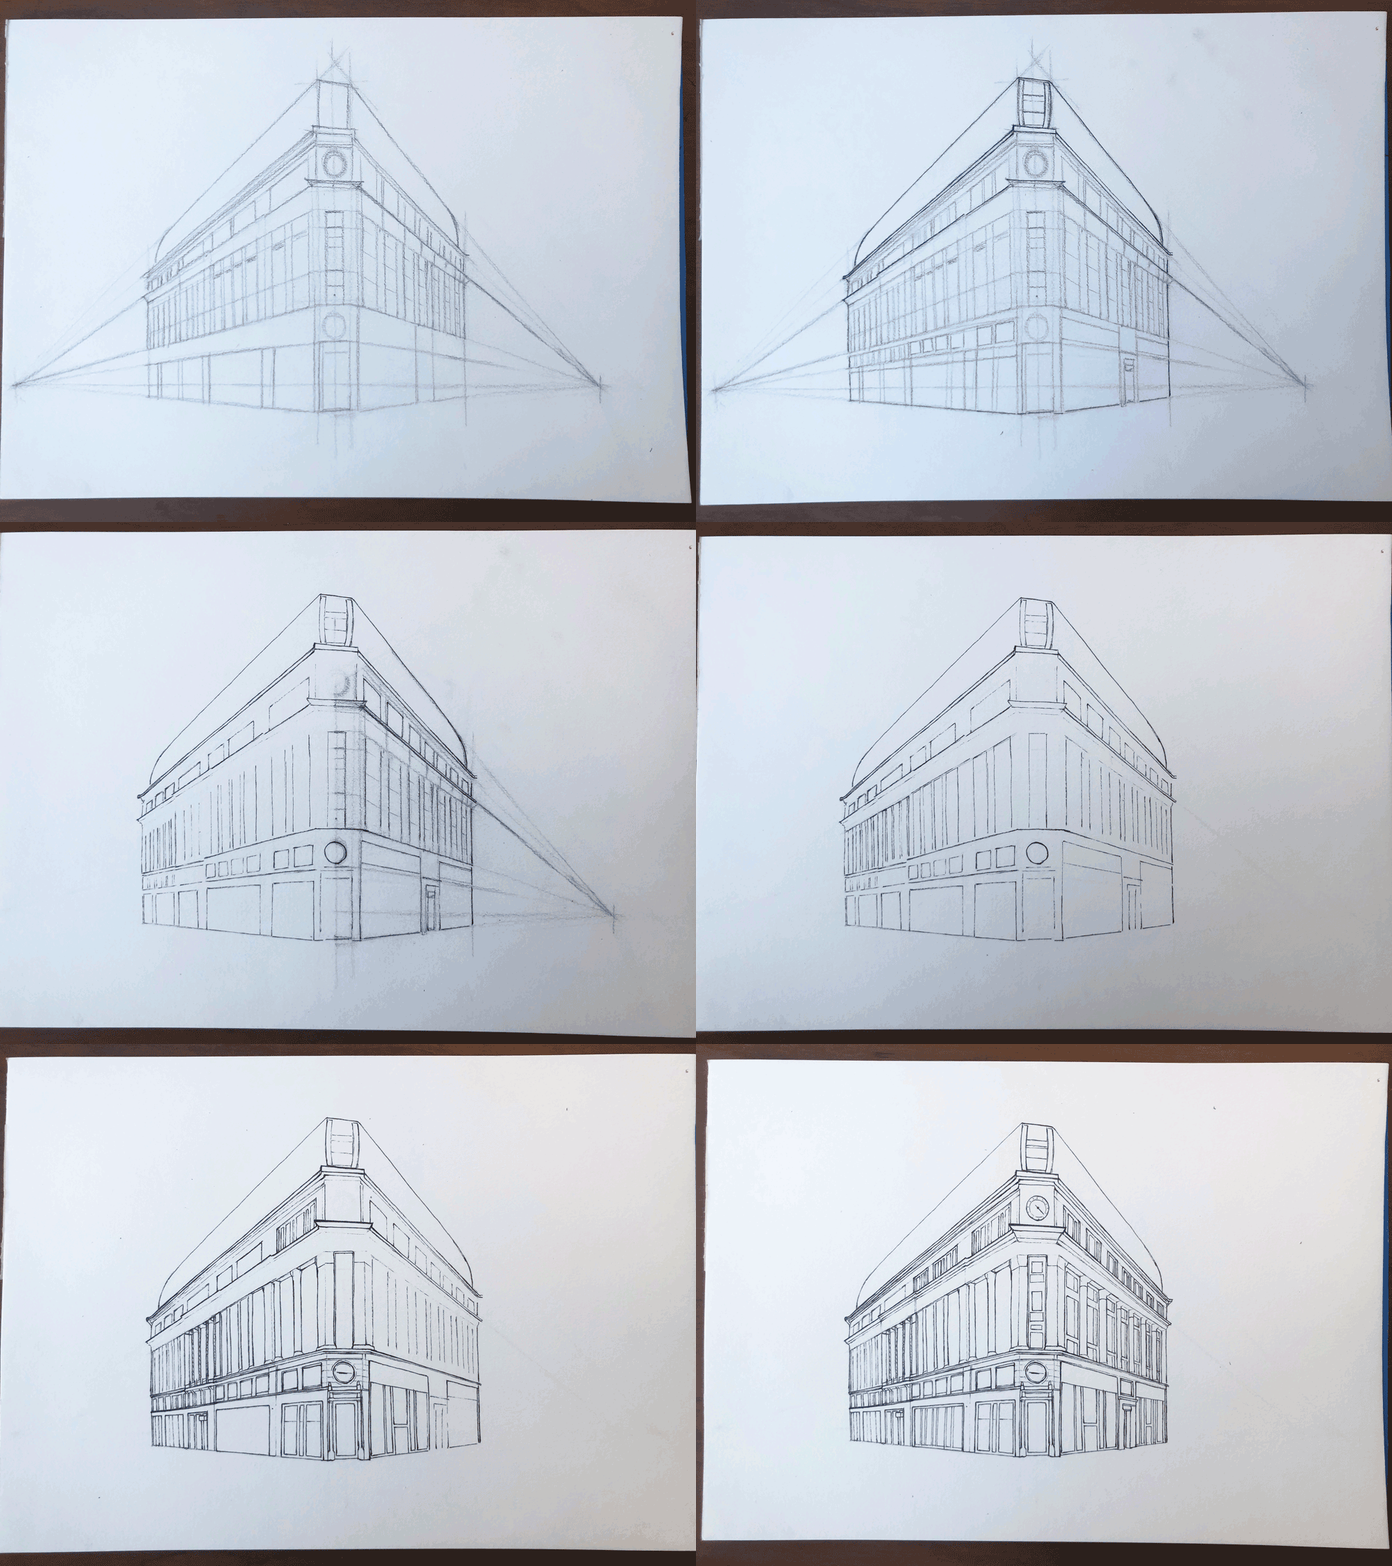
Now we can trace the pencil marks and add in all the details. There’s a couple ways in which you can do this, I tend to dart around the page adding details here and there, gradually building up the image as a whole. Another common way is to start in one area and work your way across the drawing, completing the details as you go.
Whichever way you like to do it, think about what is in front and what is behind. Don’t start drawing in details you can’t see and always be looking back at the subject for reference, once every few seconds.
Shading
One of the most important steps to completing your masterpiece is the shading, this is the part that can really define your style depending on how you like to do it. There are numerous ways to shading so play around and see which way you like the most. I’ll be talking you through the crosshatching technique.
Firstly before any lines are made, we need to think about where the light is coming from, if you’re drawing a building it’s most likely from above in one corner. If you’re drawing from imagination and find it hard to visualise, grab a lamp and any rectangular object and place it under the lamp, move it around to see how the shadows work in the light.
Finishing details
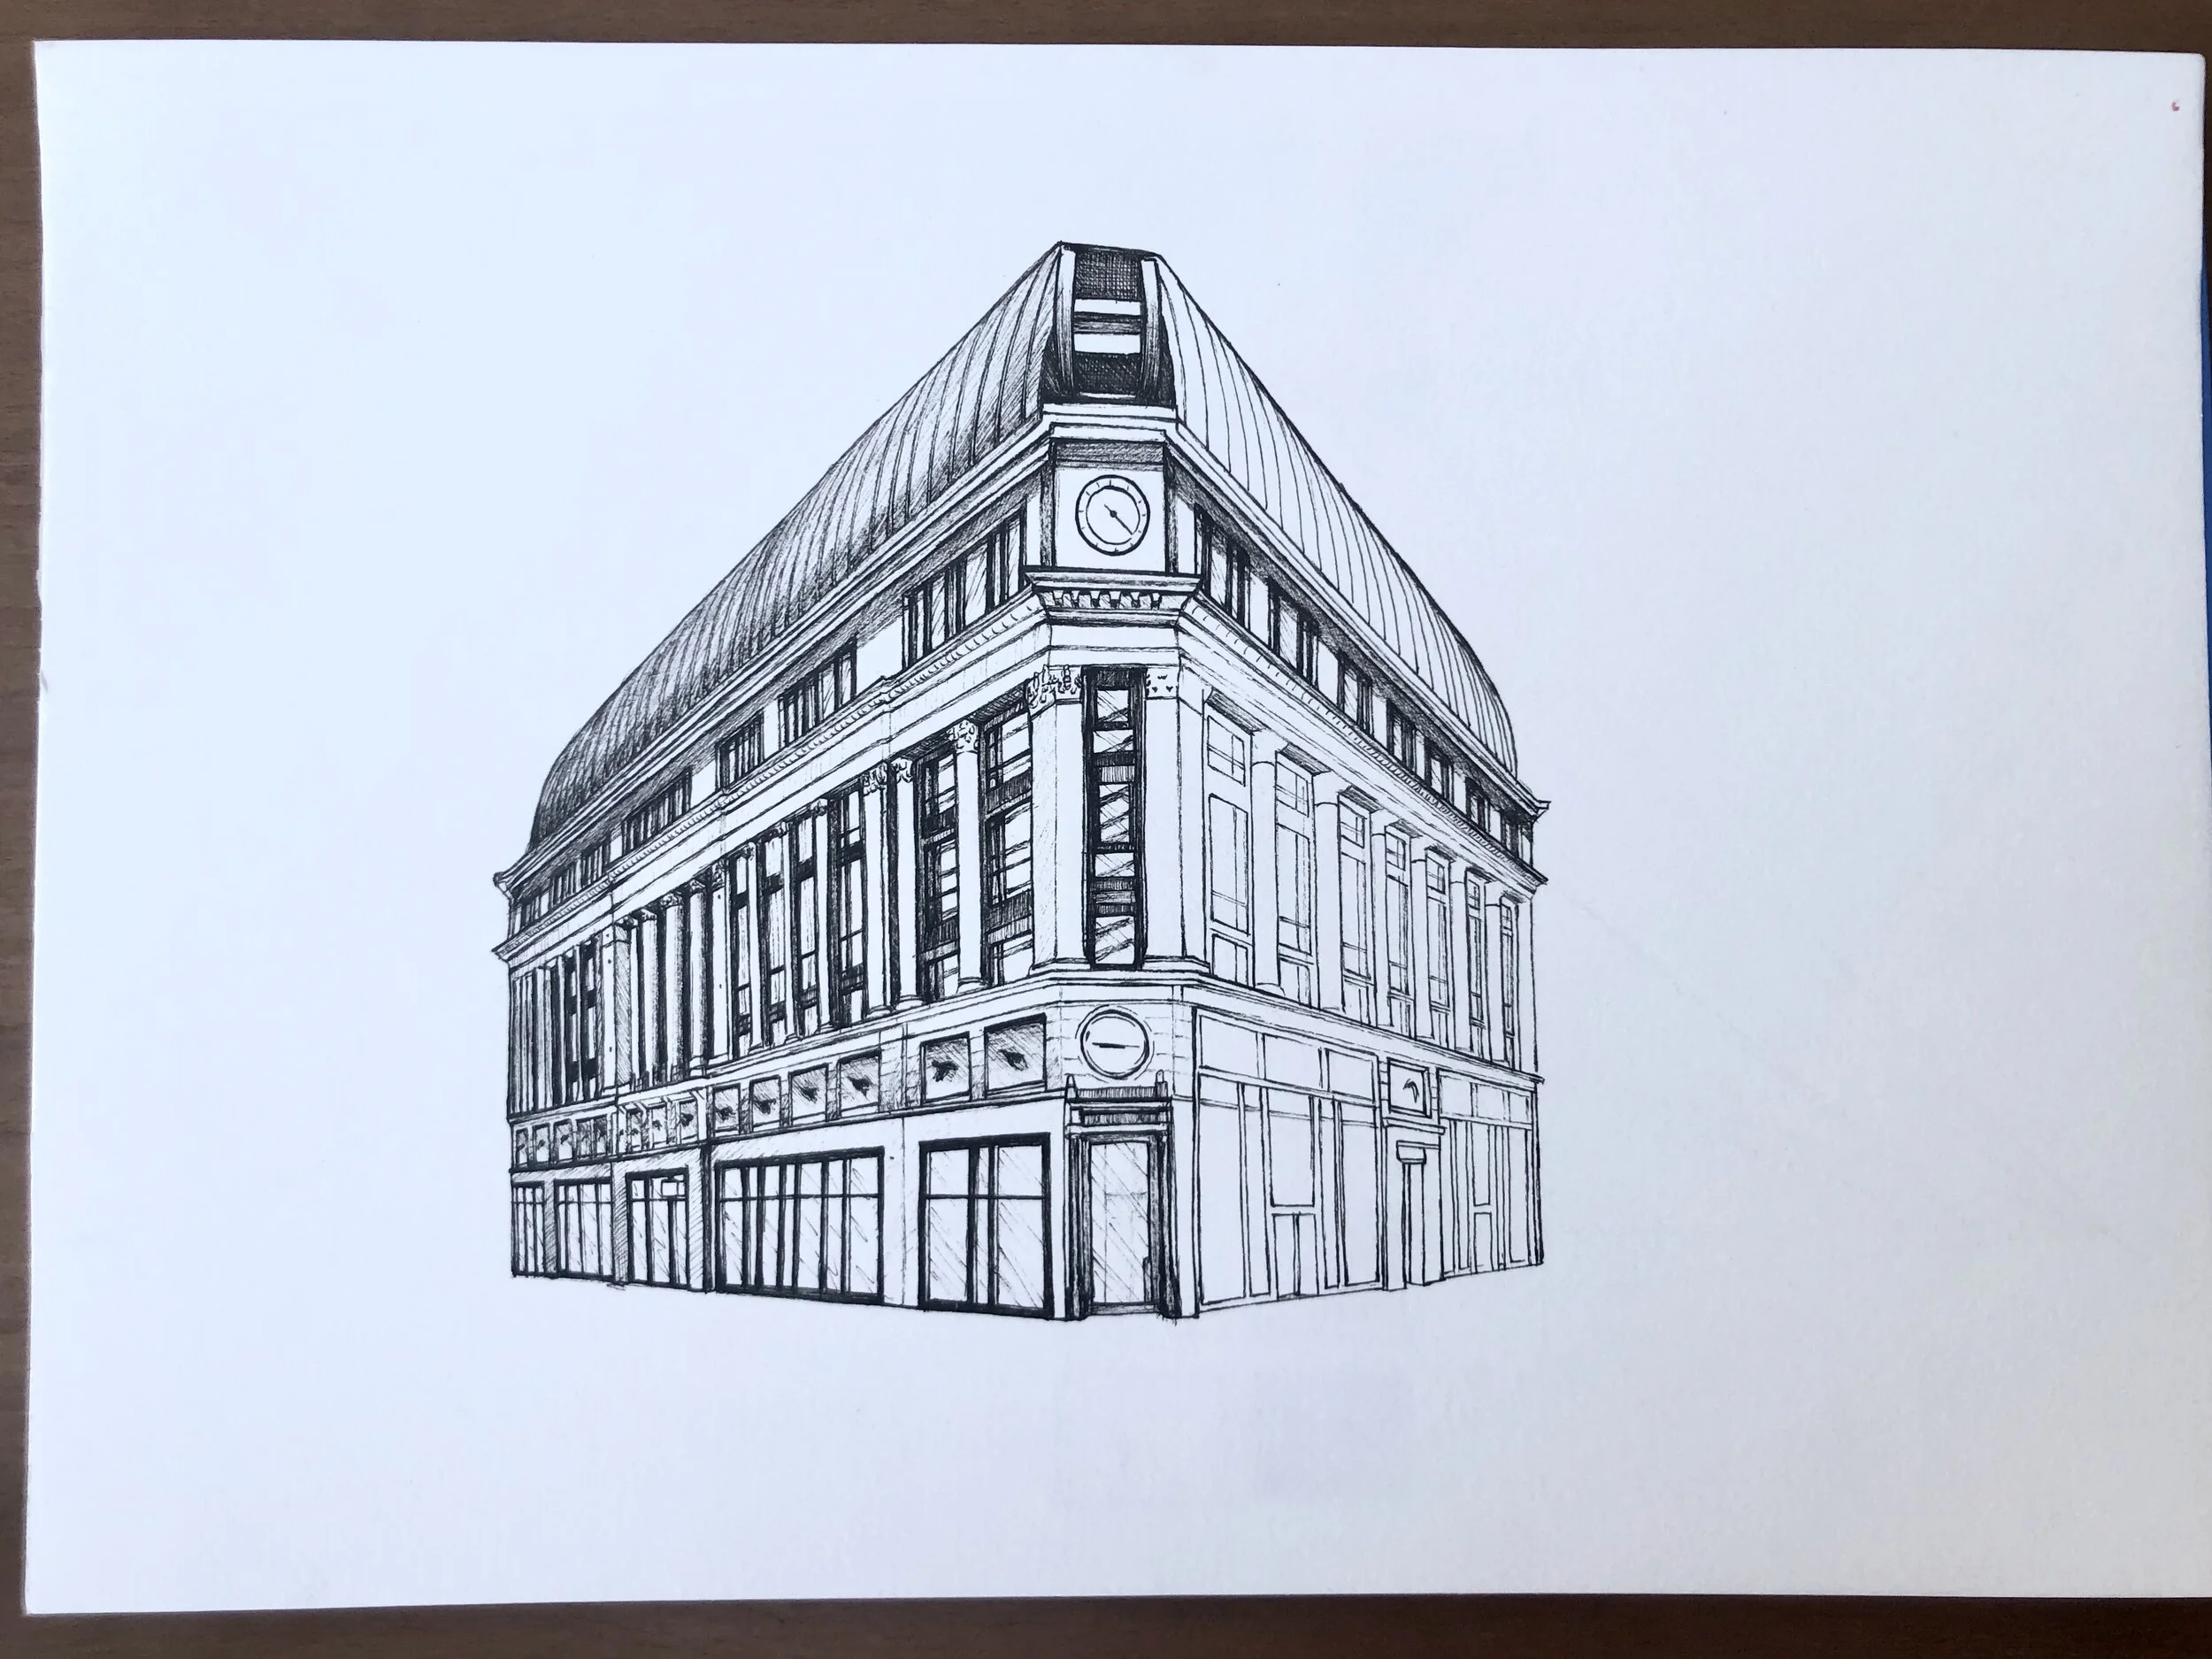
Here is my finished version below. It’s not perfect, there’re plenty of mistakes in there but the most important thing when starting out is getting all the proportions and perspectives correct. You can see in my illustration I’ve added some extra details such a faint street path, people and a couple distant buildings that fall behind the subject. This helps to give the building scale and makes the overall finish more interesting.
I hope you enjoyed taking this short tutorial and I would love to see how your illustration turned out, so please tag me @Henboydesigns, if you post it on instagram.
Tips to good practice
Stay inspired
One of the best ways to keep yourself practicing everyday is to stay inspired. Look for inspiration in everything around you act on it as soon as you can before it dwindles away. Inspiration can hit in the moment and quickly disappear so make sure to capture it as soon as possible.
Use Instagram, Pinterest or other sites to see what other creators are doing, try to take inspiration from their style and see what you can make from it.
Perfection isn’t everything
It’s easy to look at an artist work think it came out perfectly the way he planned, but I assure you that he did not. Part of the process is making mistakes and see what can be made from it, experimentation is a huge development of style.
Many artists will have defined their unique style through mistakes and trial and error.
Start small and often
You don’t need to draw for 10 hours a day to keep up good practice. Even drawing something small for 10 mins each day will help to develop your skills. Find the time to draw something you like, it doesn’t even have to be the whole subject, maybe it’s just a detail from an iconic building or an interesting window you can see from your bedroom.
If you lose interest in the subject, just start drawing something else and come back to it later, the most important thing is to keep the inspiration flowing.


